Scranton Seahorse Inn

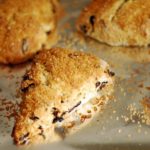
Hazelnut Scones with Cherries and Oats

Hazelnut Scones

with toasted oats and dried cherries

I love making this recipe and the hazelnuts are the star.  The aroma of the oats and hazelnuts while they’re roasting is a sign of delicious things to come.  Because of the oats I use less flour and the end result are crunchy flaky scones.  If you don’t have dried cherries you can use dried cranberries in their place.  But if you can get your hands on them it’s worth it.  Because the oats absorb some of the liquid I use 1/2 & 1/2 (versus heavy cream).


  • 1   1/4 cups Quaker oats
  • 1/2 cup coarsely chopped hazelnuts
  • 1/2 cup half & half
  • 1 large egg
  • 1  1/2 cups unbleached all-purpose flour
  • 1/3 granulated sugar
  • 2 teaspoons baking powder
  • 1/2 teaspoon table salt
  • 10 tablespoons cold unsalted butter cut into 1/2″ cubes
  • 1/2 cup coarsely chopped dried tart cherries

Preheat oven to 375 degrees

  1. Using two sheet pans, spread oats on one and the chopped hazelnuts on the other and toast until lightly browned and fragrant.    The nuts should take about 7 minutes and the oats about 5 minutes longer.  Keep an eye on them and be sure not to burn the hazelnuts.   Remove from oven and cool.
  2. Raise temperature of your oven to 425 degrees.
  3. Whisk together cream and egg.  Reserving 2 tablespoons for glazing the scones.
  4. In a food processor combine 3/4 cup of oats, the flour, sugar and baking powder and pulse a few times to combine.  Scatter in the cold butter and pulse until the mixture is the consistency of a coarse cornmeal.   Transfer this mixture to a good size mixing bowl.    Using a large rubber spatula fold in the remaining oats and nuts.  Add the cherries.
  5. Fold in the liquid ingredients until large clumps form.   Using your hand mix the dough a few more times until a large ball is formed.
  6. Dust your work surface with a little flour and then gently pat the mixture until a 7″ circle until it’s about 1″ thick.  Using a sharp knife cut into 8 wedges.  Line a sheet pan with parchment and place wedge 2″ apart.  Brush each wedge with the reserved liquid and sprinkle with a little turbinado sugar.    Place sheet pan with scones in freezer for about 10 minutes.
  7. Bake until golden brown and delicious – about 12 – 14 minutes.  Let them cool for about 20 minutes before serving.

This recipe doubles easily.  Uncooked wedges can be wrapped and frozen for 2 weeks.   If you plan to freeze the uncooked wedges don’t glaze or sugar them until your ready to cook (you can use 1/2 & 1/2)   Cook them frozen and increase the cooking time by a 5 minutes.


Cherry Scones

Cherry Scones

with a very special secret ingredient…..

Here’s another scone recipe that is a favorite among our guests at the Scranton Seahorse Inn.   This recipe comes together very quickly because I add the dry ingredients and the butter in food processor to create the scone dough.   This is also one of the few scone recipes that I use cake flour versus all purpose flour which makes for a lighter and less dense scone.

The secret ingredient is curry.  Curry is a sweet spice but it does introduce a slight kick.  The cherries and the sugar tone down the very subtle curry flavor so there’s a terrific sweet and savory balance.    I don’t usually tell my guests about the secret ingredient until they’ve tried them.   I worry that the picky eaters might turn them down before trying them.  I’d guess that 95-99% of my guests that have tried them have enjoyed them.  It’s ok to reduce the amount of curry to 1T the first time you make them but I’m confident the second time around you’ll increase it.

  • 4 cups cake flour
  • 1/3 cup granulate sugar
  • 1 T Baking powder
  • 2 T Curry Powder
  • 1 t Baking Soda
  • pinch kosher salt
  • 3/4 cup dried cherries (or cranberries)
  • 2 eggs
  • 1.5 cups heavy cream
  • 12 T  cold unsalted butter cut into small cubes

Preheat Oven to 375

  1. Add all the dry ingredients together and place into the work bowl of your food processor and pulse a couple times to combine.
  2. Sprinkle chilled butter into food processor and pulse until it’s the consistency of small peas or coarse sand. Take care to not over process.   Turn flour / butter mixture into a large bowl.   Add cherries and stir to mix.
  3. In a small bowl whisk together 1 of the eggs and cream.
  4. Add the wet mixture into the bowl with the dry ingredients and using a large rubber spatula gently fold until completely incorporated taking care to not over mix.   With lightly floured hands knead the dough making sure all the flour is incorporated before turning out onto a light floured counter or large cutting board.
  5. Using a sharp knife divide the scone dough into two equal parts.   Shape both pieces into into 6”discs. They should be about ¾ – 1” high. Cut each disc into 6 wedges by first cutting in half then cutting each half into 3 equal wedges.
  6. Place the wedges on a sheet pan lined with parchment or a silpat. Whisk the remaining egg with a splash of water and brush the tops of each.  Sprinkle turbinado sugar onto the tops.
  7. Bake on the center rack for about 20 minutes until gold brown and delicious.
  8. Cool on a wire rack before serving


.


Rum Raisin Scones

Rum Raisin Scones

the perfect accompaniment with a good cup of tea….

The rum soaked raisins make these scones so scrumptious.    The longer the raisins soak in the rum the more intense the flavor gets.    The raisins will keep 8-10 weeks in the refridgerator so I make a large batch and have them ready.  If you don’t like or can’t have rum just plump up the raisins as indicated below and skip the rum.


  • 1/2 cup raisins
  • 1/2 cup dark rum (I use Meyers)
  • 1 3/4 cups all purpose flour
  • 1 tablespoon + 1/2 teaspoon baking powder
  • 1/4 granulated sugar
  • 1/2 kosher salt
  • 6 tablespoons chilled unsalted butter cut into small pieces
  • 3/4 cup heavy cream + 2 tablespoons to brush the scones with
  • 1 – 2 tablespoons demerara sugar
  1. Place the raisins in a small saucepan and cover with water.   Bring to a boil then strain.   Now place the raisins in a small bowl and cover with the rum and let it set for at least an hour.
  2. In a mixing bowl whisk together the flour, baking powder, granulated sugar, and salt.  Toss in the cut up butter and place the bowl in the freezer for 10 minutes.
  3. Using the paddle attachment mix on low until the butter is broken up into pebble sized pieces (3 minutes).
  4. Strain the raisins reserving the rum.    Add the raisins to the flour mixture and beat just once or twice and evenly distribute them.
  5. With the mixer still on low speed and add the 1/4 cup of rum and the heavy cream until the dough comes together.
  6. Using your hands, knead the mixure in the bowl until the dough comes together completely. Turn the dough out to a lightly floured surface and roll it into a 7-inch round – about 3/4 inch thick.   Using a sharp knife cut in 12 equals wedges.  The wedges will look small but they will spread and rise in the oven.
  7. Place wedges on your baking sheet at least 1/2″ apart.  Cover with plastic wrap and freee for 15 minutes.  In the meantime preheat your oven to 375.
  8. Brush the scones with heavy cream and spinkle with the Demerara sugar.
  9. Bake for 20 minutes turning the baking sheet halfway through.
  10. Transfer to a wire rack to cool.  Serve warm.

Cocoa Banana Bread Recipe


Going Bananas

Cocoa Banana Bread

This is an easy recipe to make when you’ve got some over ripe bananas in the house.   This is a fun chocolatey breakfast bread that’s always a hit at The Scranton Seahorse Inn.   It’s fun to watch our guests react to the idea that they’re having chocolate at breakfast.  I have found this is also a great recipe to make if you’re invited to a brunch.

This is a super moist bread that’s best served the same or next day.  My experience is that it doesn’t freeze well so have a second helping!


  • 1.5 cups all purpose flour
  • 2/3  cup dutch process cocoa powder
  • 1 tsp baking soda
  • 1/2 tsp kosher salt
  • 3 medium very ripe bananas – mashed
  • 1/2 cup sour cream
  • 12 tbs softened unsalted butter
  • 1 cup granulated sugar
  • 1/2 cup light brown sugar
  • 3 eggs

Preheat your oven to 350F

  1. Sift flour, cocoa powder, baking soda & salt into a mixing bowl
  2. In another bowl mix bananas and sour cream together
  3. Cut the butter into 1″ pieces and add to the bowl of an  electric mixer with the sugar and brown sugar.   With the paddle attachment combine on medium speed until well mixed.   It should be fluffy and lightened in color.  About 2 minutes
  4. Add the eggs to the butter mixture one at a time beating smooth before each addition.
  5. Reduce the mixer to low.   Add in 1/2 of the flour mixture.   Stop the mixer and scrape down the bowl and paddle.  Add the banana mixture until it is thoroughly absorbed – about 1 minute.  Add the remaining flour mixture.   Stop and scrape down the bowl and beater one more time.
  6. Remove the bowl and using a large rubber spatula give the batter a final mixing.
  7. Pour the batter into a greased 9×5 inch loaf pan.  Smooth the top with a small offset spatula or the back of a spoon.
  8. Place the loaf pan in middle rack of your preheated oven.
  9. Bake for about 50 minutes.   The bread should be well risen, firm to the touch.  Use a cake tester or paring knife to test the doneness.   Cool in the pan for 15 minutes before removing it to cool completely on a wire rack..

Variation:   This batter can be used to make muffins too.  Yield would be 20-24.   Fill prepared muffin cups 3/4 full and bake at 350F for 30 minutes.


Have You Discovered Chia?


Chia Breakfast Porridge

Recipe

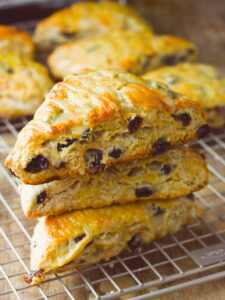
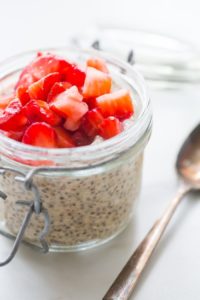
Chia seeds have amazing nutritional value and are high in antioxidants, Omega-3 and calcium.   There are a variety of seeds on the store shelves and I tend to buy the black seeds vs the white seeds.  This base recipe that follows is gluten free and dairy free and very flexible as far as what you add to the base.   I use almond milk but you can use soy, coconut, or rice milk.  I’ll be honest the only milk I haven’t used it whole milk (the chia has a lot of calcium already!).  I always try to use what ever fruit is in season once we hit spring time in Connecticut but you of course should use what ever flavor combination you love.


For each serving:

  • 1/2 cup unsweetened vanilla almond milk
  • 3 Tablespoons chia seeds
  • pinch of your favorite spice – cinnamon, cardamom, ginger
  • 1 T honey or syrup (optional)

Combing all ingredients into a mason jar or other container that has a lid with a tight seal.     Shake it like mad for a few minutes.  Put in refrigerator over night.

In the morning give it a good stir and add your nuts, fruits, coconut, or what ever your imagination tells you.  Consider using maple syrup in place of honey or cardamon in place of cinnamon.   If you try this and create a combination that you love let me know and I’ll try it out here.

Some popular toppings here include:   blueberry and lemon zest, mango and coconut flakes, fresh cherry and almonds.

I make about 15 – 20 servings at a time and it stores well in the refrigerator for at least a week.  Just be sure to stir it each time as the honey or syrup will settle.


Peanut Butter Cookies – Gluten Free

Gluten Free Cookies
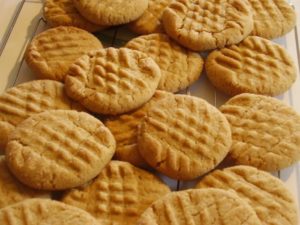
I TRY to keep our cookie jar full and I have a few go to recipes that I use to make sure our guests with cookie cravings in the middle of the night have somewhere to go.   When I know I have a gluten free guest checking in to the Scranton Seahorse Inn my peanut butter cookie recipe the one I use.   It is so ridiculously simple but so nutty and delicious.   They are so satisfying at midnight with a cup of coffee or tea too.

This recipe makes 24 cookies.  It’s 1 of everything so it’s quite easy to double, triple or quadruple.   Do what you gotta do!


Ingredients

  • 1 cup good quality creamy peanut butter.  
  • 1 cup granulated sugar 
  • 1 large egg beaten
  • 1 teaspoon baking soda
  • Seasalt (optional)
  1. Preheat oven to 350* and grease cookie sheets or line with parchment or silpat.
  2. Beat together peanut butter and sugar in a large bowl with an electric mixer until smooth.
  3. Add beaten egg and baking soda to peanut butter mixture and beat until well combined.
  4. Roll 1 teaspoon of dough into a ball and place on cookie sheet.
  5. Place dough balls one inch apart on cookie sheet.   Do the thing we all do with a fork to our peanut butter cookies.
  6. Sprinkle each with a little seasalt.
  7. Bake until puffed and a golden pale, about 10 minutes.
  8. Cool cookies on baking sheet about 2 minutes and then transfer with spatula to rack to cool.
  9. May be kept in air tight container at room temperature for 5 days.  If you have a wall safe – store them there.
  10. Makes about 2 dozen cookies.


Granola Recipe

Scranton Seahorse Inn

Healthy & Simple Granola Recipe


housemade granola

This recipe is a variation of my original granola recipe.  I was asked by a guest to create one that used less sugar and syrup.  After a few experiments this is the end result.   My guest and I are very happy with this version.   I like that the amount of sweeteners was reduced by more than 70% and the flavor was not only not compromised but improved.   You can eliminate the 3T of brown sugar completely when mixing the dry goods.   Make this once and you’ll stop buying boxed sweet cereal forever!


In a microwave or on a stovetop gently heat the following ingredients until the butter is melted.

  • ¾ cup high quality Extra Virgin Olive Oil
  • ¼ cup of your favorite local honey or local maple syrup
  • 2 T unsalted butter
  • ½ t almond extract OR pure vanilla extract

In a large mixing bowl mix together the following ingredients:

  • 4 cups rolled oats
  • ½ cup Quinoa
  • ¾ cup slivered almonds
  • ¾ cup sliced almonds
  • ¾ cup raw pepitas
  • ½ cup shredded coconut
  • 1T kosher salt
  • 1t cinnamon
  • ½t freshly ground nutmeg
  • 3T brown sugar (optional)

Stir in the warmed olive oil mixture and oats mixture with a rubber spatula.    Spread evenly on a rimmed sheet pan lined with parchment paper or silpat and cook in a 350 degree oven for 30-40 minutes until browned stirring every 10 minutes.   Cool completely.

Once cooled and just before storing, stir granola with your hands, breaking up any of the mixture that may be stuck together.  Stir in 1 cup of your favorite dried fruit. Pitted dates, cranberries, golden raisins are great.   Store in an air tight container in a refridgerator for up to two weeks.

A few notes about ingredients and substitutions.

  1. Great olive oil is key. We are lucky to have Shoreline Vine here in Madison and I use their Picual EVOO for this recipe because it’s naturally sweet and appropriately earthy for this recipe.   I personally don’t recommend flavored or infused olive oil for your granola but this is about you and your taste buds.   Experiment! If you don’t have a store like Shoreline Vine near you (they do ship by the way!) then find a high quality extra virgin olive oil in your supermarket
  2. If you don’t like almonds substitute your favorite nuts in equal quantities.
  3. When springtime arrives I used whatever fruit is local & fresh in place of dried fruits. If you use fresh fruit just wash and chop and add to your granola just before serving with yogurt or milk.
  4. I serve this granola frequently and this is a fairly large batch.   You can easily cut this recipe in half by dividing all ingredients by 2.


Easy Irish Soda Bread Recipe

soda bread
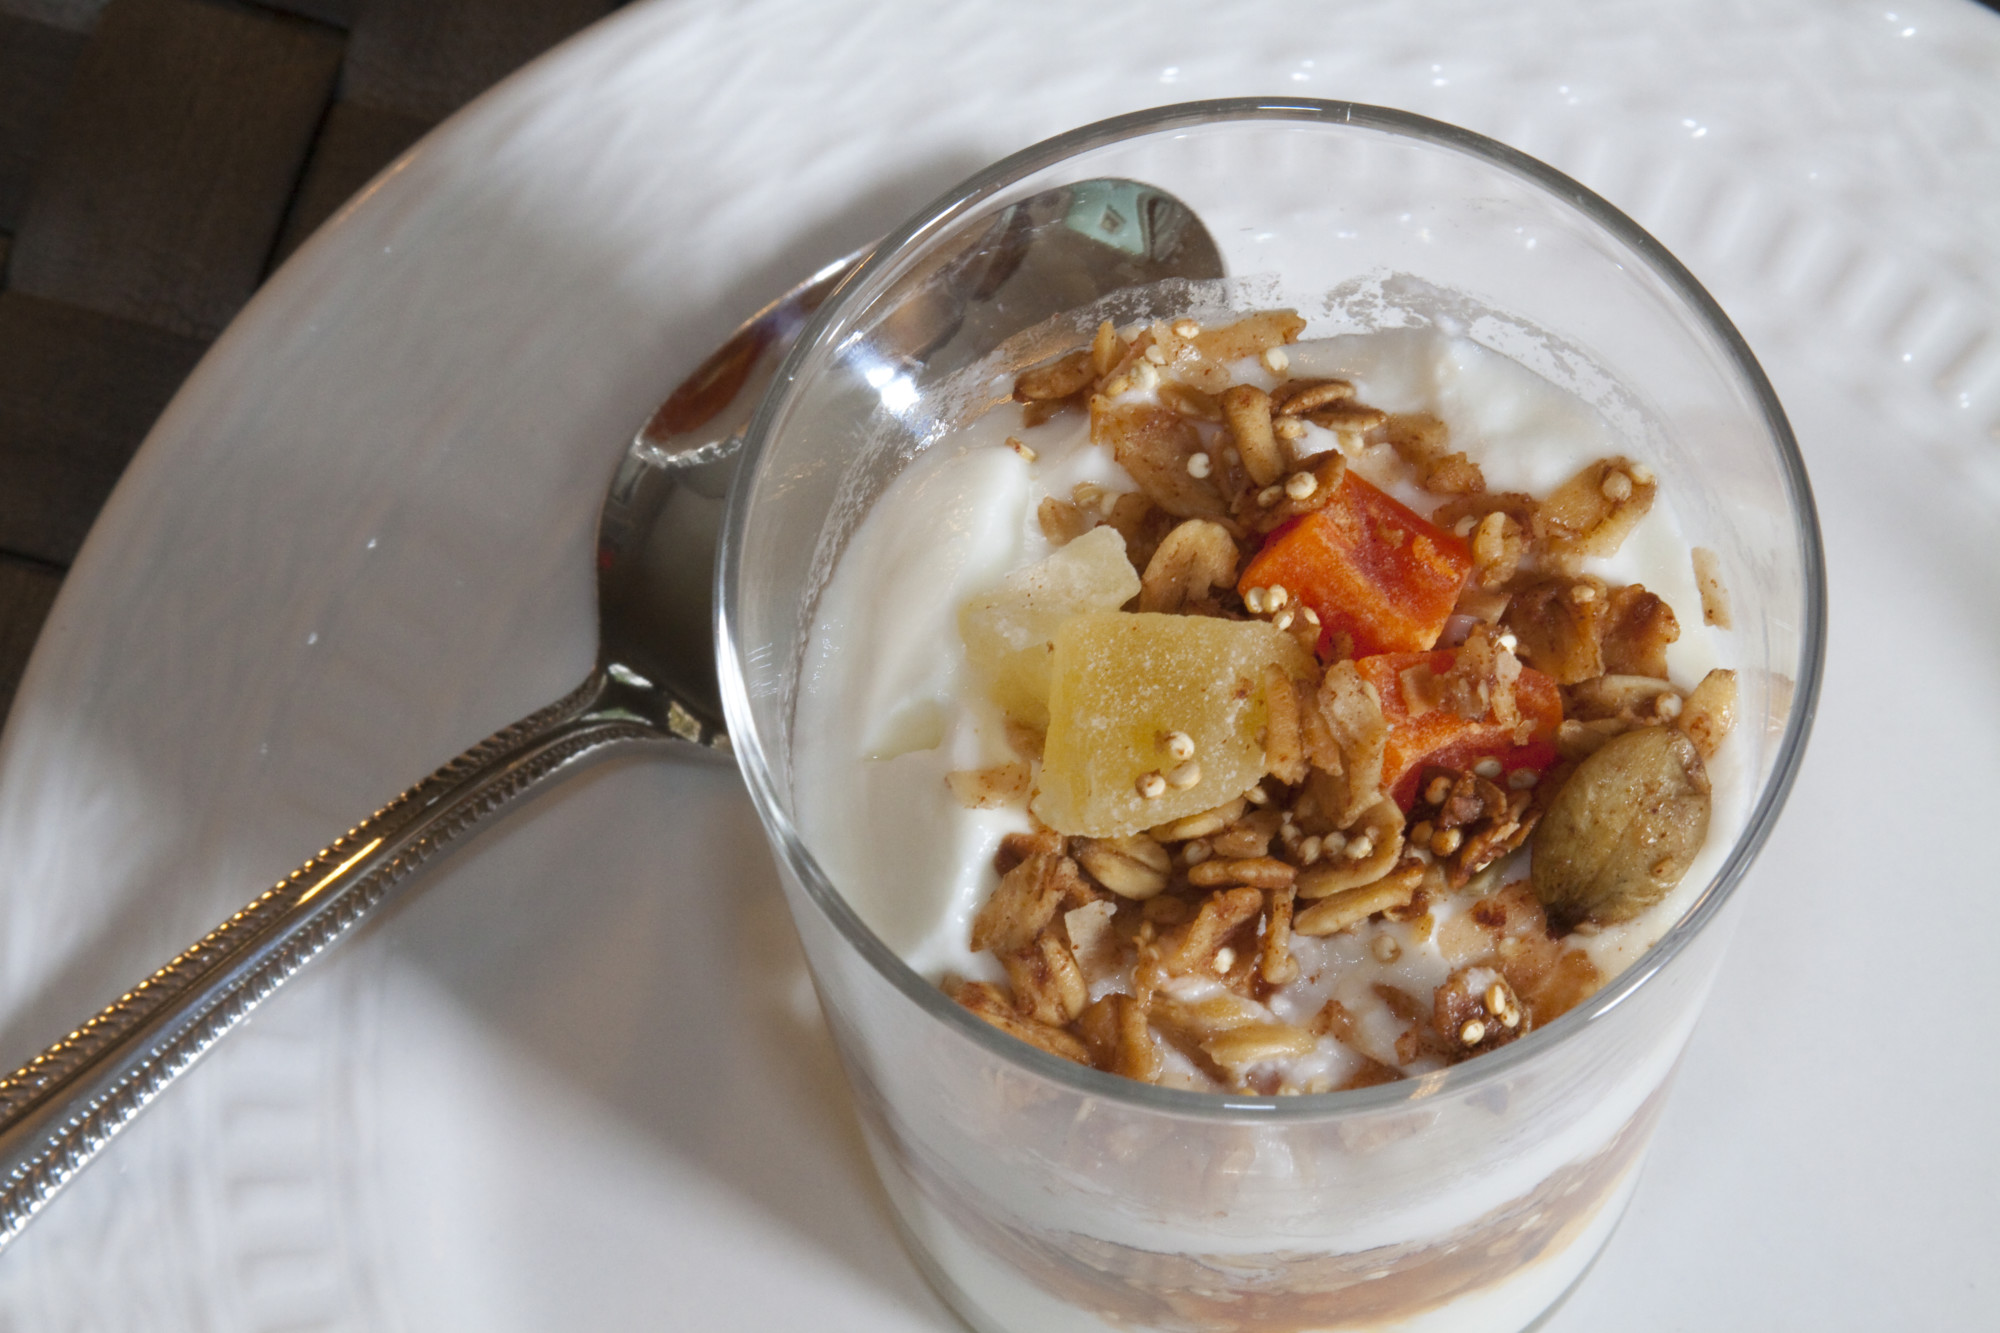
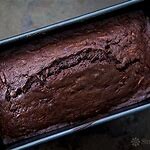
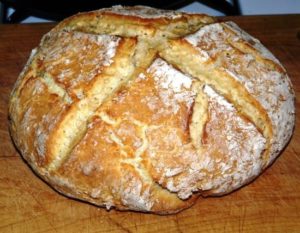
Tis the season!  For Irish Soda Bread that is.    Not sure why I don’t make this more than I do.   Everyone seems to gobble it up when withI make it.   Maybe too much of a good thing comes into play.  Below is the recipe I’ve adapted from others I’ve experimented .   There’s no yeast in this bread so it’s quick to make.   It’s the bread flour in this recipe  that makes it cripy chewy so definitely splurge and use it in this recipe.

10 ounces White Whole Wheat Flour
5 1/4 ounces Unbleached Bread Flour
1 1/4 ounces granulated sugar
1 teaspoon baking soda
3/4 teaspoon kosher salt
3 ounces currants or raisins
1/2 stick very cold butter, cut into 8 pieces
1 1/3 cups buttermilk
1 large egg

In a medium-sized mixing bowl, whisk together the flours, sugar, baking soda, salt, and currants or raisins. Using pastry fork cut in the butter until it’s evenly distributed and no large chunks remain.

In a separate bowl whisk together the buttermilk and egg. Pour this mixture into the dry ingredients and mix to combine. The dough will be stiff; if it’s too crumbly to squeeze together, add another tablespoon or two of buttermilk.

Knead the dough a couple of times to make sure it’s holding together, then shape it into a ball. Flatten the ball slightly, and place the loaf in a lightly greased 8- or 9-inch round cake pan.  Remember there is no yeast in bread so it won’t spread much, so the pan doesn’t have to be large. Use a sharp knife to cut a 1/2-inch deep cross, extending all the way to the edges, atop the loaf.

Bake the bread in a preheated 400°F oven for 45 to 55 minutes, until it’s golden brown and a cake tester inserted into the center comes out clean. Remove the bread from the oven, and brush the top with melted butter.

Hot Chocolate Recipe

The November chill is setting in and combined with the rain and grey skies I’m craving hot chocolate.  Some would say that any day is a good day for hot chocolate.   Our favorite cup of cocoa is easy to make and uses real good quality dark chocolate for a very rich flavor.

hot chocolate

1 cup of chopped bittersweet Callebaut chocolate

Heat 2 cups steamed whole milk in a heavy bottomed sauce pan.

Whisk in chocolate until it melts and is well blended into hot milk. Pour into cups, top with mini marshmallows, cinnamon or   your favorite liquor like Frangelico or Kahlua.

I think once you make a cup of hot chocolate using this recipe you may never go back to the packets again.    Enjoy and stay warm!

Mint & Green Tea Simple Syrup Recipe

mintThis is for the mint lovers out there.   Recent guests from San Diego Maureen and Carlton asked me to please post this recipe so here it is guys!

We grow our own mint out in the garden and I’m forever trying to come with different ways to use it.   I like this recipe for a simple syrup infused with green tea and fresh mint.   I toss local fresh ripe cantaloupe and/or watermelon with this fragrant syrup and serve it as a first course in the summer months when the ingredients are fresh.   When you’re done a little of this sweet syrup goes a long way to taste test as you add it to your fruits of choice.  If you try it Let me know what you think.

  • 2 cups granulated sugar
  • 1.5  cups water
  • 1 T white corn syrup
  • 2 green tea bags
  • 1/2 c packed fresh mint leaves

Combine the sugar, water and corn syrup in a sauce pan can cook over medium heat for about 15 minutes.   Don’t let the syrup boil but heat long enough to make sure the granulated sugar is completely dissolved.

Chop the mint and place 1/2 of it in a mesh tea bag or infuser and set aside the other 1/2 aside.  Place the infuser filled with mint and the green tea bag in the syrup.    Remove from heat and allow the syrup to cool completely (about 1 hour).

When cool remove the mint the green tea.    Stir in the remaining mint.  This will last in a covered container in the refrigerator for about 2 weeks.

Enjoy!